Your Huion tablet is installed and working — but Photoshop still needs its own setup. Here's exactly how to get pressure, shortcuts and your workflow right.
Introduction
Getting a Huion tablet recognised by Windows or macOS is only half the job. Plenty of people install the driver correctly, see the tablet respond in the driver's own Pressure Test area, and then open Photoshop only to find the pen draws a hard, uniform line with no pressure at all, or that the shortcut buttons do something completely different from what they expected. That gap between "the driver works" and "Photoshop works" is what this guide covers.
Everything below assumes your Huion tablet is already installed and connected. If it isn't yet, our driver installation and setup guide covers that first step in full, for both Windows and macOS.
What This Guide Covers (and What It Doesn't)
This is a Photoshop-specific guide, not a second driver-installation guide. It does not repeat how to download, install or connect a Huion tablet — that ground is already covered in detail elsewhere. What it does cover is everything that happens after the driver is working: turning on pen pressure inside Photoshop itself, getting Windows Ink and WinTab pointed the right way for your Photoshop version, mapping the tablet's buttons to Photoshop's own shortcuts, and the handful of problems that are specific to Photoshop rather than to the tablet or driver in general.
If you're still deciding which tablet to buy, our complete buying guide and our size guide cover that decision. This article picks up once you already own one.
- 01Turning On Pen Pressure in Photoshop's Brush Settings
- 02Windows Ink vs WinTab: Which One Photoshop Needs
- 03Fixing "Pen Pressure Not Available" in Photoshop
- 04Mapping Huion Buttons and Press Keys to Photoshop Shortcuts
- 05Work Area Settings for a Photoshop Workflow
- 06Pen Tablet vs Pen Display: What Changes Inside Photoshop
- 07Calibrating a Pen Display's Cursor in Photoshop
- 08A Beginner-Friendly Brush and Workflow Setup
- 09Common Photoshop-Specific Problems and Fixes
- 10Recommended Graphics Tablets Kenya Products for Photoshop Beginners
Before You Start: Driver and Pressure Test Recap
Before touching any Photoshop setting, confirm two things in the Huion driver itself: your tablet shows as connected, and drawing in the driver's own Pressure Test area produces a line that gets visibly thicker or darker as you press harder. If either of those isn't true yet, the problem is at the driver level, not the Photoshop level, and our driver installation and setup guide is the right place to fix it — nothing in this article will help until that basic check passes.
Once the driver confirms pressure is working, the rest of this guide is about getting that same pressure recognised inside Photoshop specifically, which is a separate step.
Turning On Pen Pressure in Photoshop's Brush Settings
Photoshop does not automatically use a tablet's pressure data just because the tablet is connected and working. Pressure has to be explicitly turned on for the brush you're using, inside Photoshop's own Brush Settings panel — this is a Photoshop setting, separate from anything in the Huion driver.
- Select the Brush tool (press B), then open Window > Brush Settings.
- In the Brush Settings panel, select Shape Dynamics in the list on the left.
- Set the Control dropdown under Size Jitter to Pen Pressure.
This single setting is what makes your brush size respond to how hard you press. If you also want your brush's opacity to respond to pressure — useful for natural-feeling shading — select Transfer in the same panel and set its Control dropdown to Pen Pressure as well. Size and opacity are controlled separately, so both need to be set individually if you want both to respond.
If Photoshop shows a small warning triangle next to the Control dropdown, Photoshop isn't currently detecting a pressure-sensitive input at all — that's a sign to check the Windows Ink / WinTab setting covered next, rather than a Brush Settings problem.
Windows Ink vs WinTab: Which One Photoshop Needs
This is the single most common reason pressure works in the Huion driver's own test but not in Photoshop, and it only applies on Windows — macOS does not have this distinction at all, and the Mac-specific requirement is covered in the next section instead.
Windows offers two different ways for a tablet driver to pass pressure data to an application: Windows Ink and the older WinTab protocol. The Huion driver and Photoshop both need to agree on which one is in use, or pressure will not come through at all.
This is genuinely version-dependent, so don't treat either setting as universally correct: current Photoshop versions (2020 and later) generally expect Windows Ink enabled in the Huion driver's settings. Older versions of Photoshop, and older creative applications generally, more often expect WinTab instead, meaning Windows Ink should be switched off in the driver for those cases. If you're not certain which your installed Photoshop version needs, try Windows Ink enabled first, since that covers current Photoshop releases, and switch it off only if pressure still doesn't register. Even on current Photoshop releases, Windows Ink pen behaviour has had its own reported bugs from time to time, so if pressure was working and suddenly stops after a Photoshop or Windows update, toggling Windows Ink off and back on in the driver is a reasonable troubleshooting step in its own right, not just a one-time compatibility setting.
Two practical notes: Photoshop needs to be fully closed and reopened after you change this setting in the driver — it will not pick up the change while running — and if you previously followed an older troubleshooting guide that had you create a file called PSUserConfig.txt (a workaround that forces Photoshop into WinTab mode), that leftover file can conflict with Windows Ink on current Photoshop versions. Its effectiveness has become inconsistent across recent Photoshop releases, so treat it as something worth removing if pressure still won't work once the Windows Ink setting itself is correct, rather than as a guaranteed fix on its own.
Fixing "Pen Pressure Not Available" in Photoshop
If Photoshop's Brush Settings panel shows Pen Pressure as greyed out, or the warning triangle mentioned earlier, work through these in order:
- Confirm the driver-level check first. Reopen the Huion driver and draw in its Pressure Test area. If pressure doesn't respond there either, this is a driver-level problem — see our driver guide rather than continuing here.
- Check Windows Ink is set correctly for your Photoshop version, as above, and fully restart Photoshop after changing it.
- On Windows, try the driver's Wintab diagnostic. Recent Huion driver versions include a "Software Diagnosis" option that checks the installed Wintab32 file for corruption or version mismatches — a corrupted Wintab file is a known cause of "can't draw or click at all" rather than just missing pressure.
- On Mac, check Accessibility permissions. Both Photoshop and the Huion driver need to be individually ticked under System Settings (or System Preferences on older macOS) > Privacy & Security > Accessibility. This is the same permission our driver guide covers for getting the tablet working at all — if it was missed there, it will affect Photoshop too.
- Restart Photoshop, and if needed, your computer. A surprising number of pressure issues clear up after a full restart, particularly after changing the Windows Ink setting.
Mapping Huion Buttons and Press Keys to Photoshop Shortcuts
Huion's driver lets you assign different button behaviour for different software, so your tablet's buttons can do one thing in Photoshop and something else entirely in another program. Setting this up specifically for Photoshop is what makes the shortcut keys actually useful rather than just confusing.
Press Keys (Express Keys)
In the Huion driver, look for an option along the lines of "Add Programs" or "Add App" (the exact wording varies slightly between driver versions) and add Photoshop as a recognised application. Once Photoshop has its own profile, open the Press Key section and assign each physical button to a Photoshop shortcut you actually use often — common choices are Undo, Zoom In/Out, Change Brush Size, and toggling the Eraser. By default, without a Photoshop-specific profile, button assignments apply globally to every program, which is usually not what you want once you use more than one creative application, since different programs use different shortcuts for the same action.
Pen Side Buttons
The buttons on the pen itself work the same way and are configured in the driver's Digital Pen section. A common, practical setup is one button for Right-Click (useful for Photoshop's context menus) and the other for a press-and-hold Eraser toggle, so you can switch between drawing and erasing without reaching for the keyboard. Note that some of the more compact tablets, including the entry-level Inspiroy H420X, have no physical press keys on the tablet body at all — on those, pen buttons and keyboard shortcuts do the work that press keys would otherwise handle.
Work Area Settings for a Photoshop Workflow
The Huion driver's Work Area setting controls how the tablet's surface maps to your screen, and it matters more in Photoshop than in simpler programs because Photoshop's panels, palettes and toolbars take up real screen space around the canvas.
If you work on a single monitor, the default Full Area setting, mapping the entire tablet surface to the entire screen, is usually the right starting point. If you work across two monitors — for instance, Photoshop's canvas on one screen and reference images or panels on another — check the driver's display selection setting to confirm the tablet is mapped to the correct screen, since by default some driver versions map to all connected displays at once, which can make the cursor feel imprecise while drawing. Our tablet size guide covers how a tablet's active area interacts with monitor size in more general terms, if you're still deciding on a tablet rather than configuring one you already own.
Pen Tablet vs Pen Display: What Changes Inside Photoshop
Everything covered so far applies equally whether you own a screenless pen tablet or a pen display, with one exception covered in the next section. Inside Photoshop, the practical difference comes down to where your attention is: on a pen tablet, you draw on the pad while looking at the monitor, so your hand and your eyes are in two different places; on a pen display, you draw directly on the screen, so the line appears exactly where the pen touches.
This affects how some Photoshop tools feel rather than whether they work. Precise placement tasks — the Pen tool, careful selections, fine retouching — tend to feel more direct on a pen display, since you're marking exactly where you're looking. Broad brush work and painting are comfortable on either, and plenty of professional illustrators work entirely on screenless pen tablets. Neither is a Photoshop limitation; it's a preference our pen tablet vs pen display vs pen computer guide covers in more depth if you're still deciding between the two.
Calibrating a Pen Display's Cursor in Photoshop
This section applies only to pen displays — screenless pen tablets have no on-screen cursor position to calibrate, since there's no screen built into the tablet itself.
On a pen display, if Photoshop's cursor consistently appears slightly offset from where the pen tip actually touches the screen, that's a calibration issue, and it's fixed in the Huion driver rather than in Photoshop. Recent Huion driver versions include a Cursor Calibration option (typically under the tablet's own Settings), which walks through tapping a series of on-screen targets with the pen to realign the cursor to the pen tip.
It's worth knowing that a small amount of offset toward the very edges of any pen display's screen is normal and expected across the industry — published accuracy standards for pen displays are typically around ±0.5mm near the centre of the screen and ±1 to 3mm toward the edges, and this applies to pen displays generally, not to a fault with a specific unit. If the offset is only noticeable in Photoshop and not elsewhere, check Photoshop's own display or canvas rotation settings before assuming the tablet itself is at fault.
A Beginner-Friendly Brush and Workflow Setup
Once pressure and buttons are working, a few small Photoshop settings make the tablet noticeably more comfortable to draw with day to day:
- Start with a simple round brush that has Shape Dynamics and Transfer both set to Pen Pressure, as covered above, rather than a complex textured brush — it's easier to feel what pressure is actually doing on a plain brush.
- Use Caps Lock or the Precise Cursor option if you want to see the brush's exact edge rather than the standard round cursor, useful for detailed work.
- Set one press key to toggle the Eraser so you can correct a stroke without switching tools from the keyboard or the toolbar.
- Turn on tilt-based brush angle if your pen supports tilt (check under Shape Dynamics > Angle Jitter, Control set to Pen Tilt) for more natural shading with angled brushes — only worthwhile if you've deliberately assigned a brush that uses angle.
- Save your setup as a Tool Preset once a brush feels right, so you don't have to rebuild the same Shape Dynamics and Transfer settings from scratch next time.
Common Photoshop-Specific Problems and Fixes
| Problem | Likely cause | What to do |
|---|---|---|
| Pressure works in the Huion driver's test, not in Photoshop | Windows Ink / WinTab mismatch for your Photoshop version | Set Windows Ink correctly in the driver for your Photoshop version, then fully restart Photoshop |
| Brush size doesn't change with pressure at all | Shape Dynamics Control isn't set to Pen Pressure | Window > Brush Settings > Shape Dynamics > Control: Pen Pressure |
| Brush opacity doesn't change with pressure | Transfer Control isn't set to Pen Pressure (a separate setting from Shape Dynamics) | Brush Settings > Transfer > Control: Pen Pressure |
| Press keys trigger the wrong action in Photoshop | No Photoshop-specific profile, so a global or another app's assignment is active | Add Photoshop as its own app in the Huion driver and reassign the keys under that profile |
| Cursor is offset from the pen tip (pen displays only) | Cursor calibration has drifted | Run Cursor Calibration in the Huion driver's settings |
| Can't draw or click at all in Photoshop | Corrupted or mismatched Wintab file | Run the Huion driver's Software Diagnosis / Wintab check |
| Setting changes don't seem to take effect | Photoshop was left open while the driver setting changed | Fully close and reopen Photoshop after any driver-side change |
Recommended Graphics Tablets Kenya Products for Photoshop Beginners
Any Huion tablet the Huion driver supports will work with Photoshop using the steps above. The three below are simply a practical spread by budget and format for someone starting out, not a requirement.
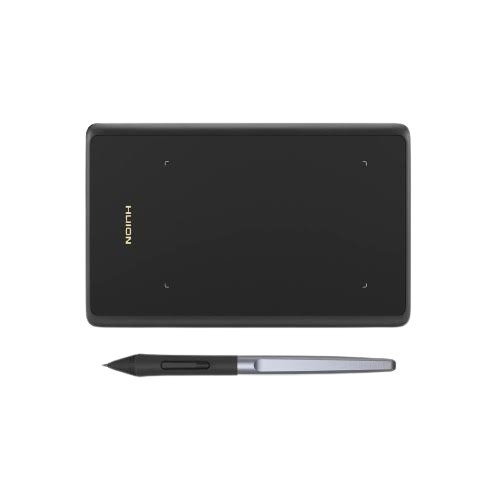
Huion Inspiroy H420X — The Lightest Budget Option
A compact, screenless pen tablet with a 106 x 66mm (4.17 x 2.6 inch) working area and 8,192 levels of pressure sensitivity, currently Ksh 5,999 (from Ksh 6,999) and in stock. It has no physical press keys, so Photoshop shortcuts on this model come from the pen's two side buttons plus the keyboard, as covered above.
What's in the box: the H420X pen tablet, a Huion PW100 battery-free digital pen, 8 replacement pen nibs, a pen nib clip, a USB-C cable, a USB-C adapter, and a quick start guide.
See the full listing at Huion Inspiroy H420X.
Huion Inspiroy H580X — More Room and Shortcut Keys
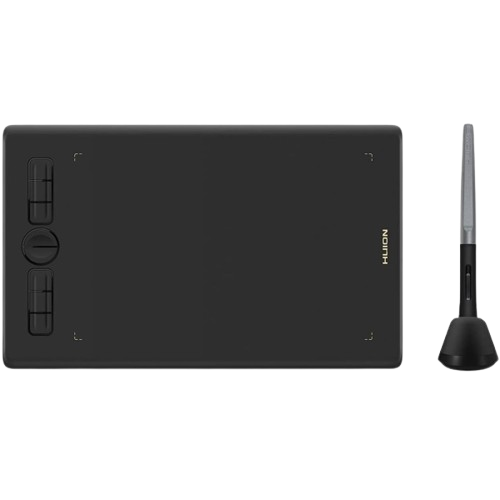
A mid-size pen tablet with a 203.2 x 127mm (8 x 5 inch) working area, 8,192 levels of pressure sensitivity, ±60° tilt recognition and 8 programmable press keys, currently Ksh 9,999 (from Ksh 11,000) and in stock. The extra working area and full set of press keys make it a comfortable step up once basic Photoshop shortcuts start feeling limiting on a smaller tablet.
What's in the box: the H580X pen tablet, a Huion PW100 battery-free digital pen, pen nibs with a removal tool, a USB-C cable, and a user manual.
See the full listing at Huion Inspiroy H580X.
Huion Kamvas Pro 13 (2.5K) — If You Want a Screen
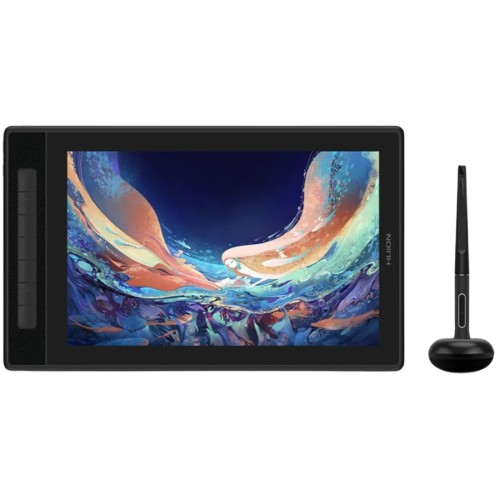
A 13.3-inch QHD+ pen display with a fully laminated, anti-glare surface, 8,192 levels of pressure sensitivity, ±60° tilt recognition and 7 programmable press keys, currently Ksh 55,999 (from Ksh 67,999) and in stock. This is the option for anyone who has read the pen-tablet-vs-pen-display section above and knows they want to draw directly on the screen in Photoshop rather than looking at a separate monitor.
What's in the box: the Kamvas Pro 13 (2.5K) pen display, a Huion PW517 battery-free digital pen, a Huion ST200 foldable stand, a pen holder, 5 standard pen nibs, 5 felt pen nibs, a pen nib clip, a 3-in-2 cable, a USB-C to USB-C cable (1m), a USB power cable, a USB extension cable, an artist glove, a cleaning cloth, and a quick start guide.
See the full listing at Huion Kamvas Pro 13 (2.5K).
For more on what specific features like pressure levels and tilt actually do, see Product Features, and for a broader look at picking between a pen tablet, pen display or pen computer, see our device type guide.
Frequently Asked Questions
Do I need to change any of this if I also use another program like Clip Studio Paint?
The Windows Ink / WinTab setting and cursor calibration are system and driver-level settings that affect every program, not just Photoshop, so they carry over. Press key and pen button assignments are per-application in the Huion driver, so Photoshop's shortcut profile won't affect what the same buttons do in a different program — each needs its own profile if you want different behaviour.
Why does my pen work fine in Photoshop but the pressure feels too light or too heavy?
This is a feel preference rather than a fault. The Huion driver has its own pen pressure sensitivity slider, separate from Photoshop's Shape Dynamics setting, which adjusts how much physical force is needed to reach maximum pressure — adjust that in the driver rather than in Photoshop if the response itself feels off.
Can I use a Huion tablet in Photoshop on a Mac and get the same settings as Windows?
Mostly yes, with one difference: Windows Ink and WinTab are Windows-only concepts and don't apply on macOS at all. On a Mac, the equivalent requirement is granting both Photoshop and the Huion driver Accessibility permission, covered in our driver guide. Brush Settings, press key profiles and cursor calibration all work the same way on both platforms.
Does tilt actually do anything in Photoshop by default?
Not unless a brush is specifically set up to use it. Tilt has to be assigned to something, typically brush angle, under Shape Dynamics with Control set to Pen Tilt, the same way pressure has to be assigned to size or opacity. A tablet and pen that support tilt won't visibly change your linework until a brush is configured to respond to it.
I changed my Windows Ink setting and now nothing has changed. Did it not save?
The most common cause is Photoshop still being open when the setting was changed. Close Photoshop completely, confirm the setting in the Huion driver, and then reopen Photoshop rather than just switching back to it.
Is a pen display more accurate than a pen tablet in Photoshop?
Not in terms of the pressure or line data Photoshop receives — that's identical regardless of screen. A pen display's on-screen cursor can have a very small calibration offset near the edges of the screen, covered above, which a screenless pen tablet simply doesn't have since there's no on-screen cursor to align.
Next Steps
If your Huion tablet isn't installed and connected yet, start with our driver installation and setup guide before coming back to this article. If you're still deciding which tablet to buy, our complete buying guide, our pen tablet vs pen display vs pen computer guide and our size guide cover that decision in detail, or try Find My Tablet for a specific recommendation. For driver downloads by model, see Software Drivers, and if something in this guide doesn't resolve your issue, our Support team can help directly.